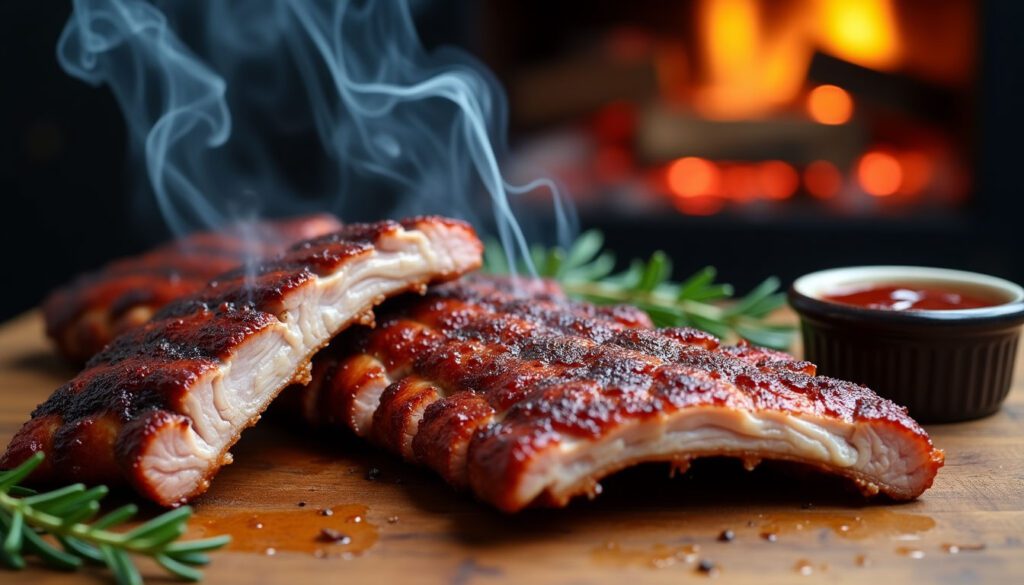
How to Smoke Pork Riblets: A Delicious Smoked Riblets Recipe
Did you know that 7 out of 10 home cooks overcook their ribs, turning what should be a mouthwatering feast into a tough, chewy disappointment?
The secret to perfectly tender, fall-off-the-bone riblets isn’t just about throwing them on the smoker and hoping for the best. It’s about understanding the right techniques, temperatures, and timing that transform these often-overlooked cuts into a BBQ masterpiece.
Whether you’re a seasoned pitmaster or firing up your smoker for the first time, this smoked riblets recipe will guide you through every step of the process. From selecting the perfect cut to mastering the 3-2-1 smoking method, we’ll help you create riblets so good, your guests will think you’ve been smoking meat for years.
Ready to learn the secrets of smoking perfect riblets? Let’s dive in!
Understanding Pork Riblets
Before diving into your smoked riblets recipe journey, let’s understand exactly what you’re working with. Riblets are smaller portions cut from a full rack of pork ribs, typically about 2 inches wide. Unlike regular ribs, these bite-sized cuts make perfect appetizer portions while maintaining the same meat-to-bone ratio as their larger counterparts.
What Are Riblets vs Other Rib Cuts
Riblets shouldn’t be confused with rib tips, which are the cartilage-rich ends trimmed from spare ribs. When butchers trim spare ribs to create uniform St. Louis-style cuts, the removed pieces become riblets. These smaller cuts offer the same delicious flavor as full racks but cook more quickly and are often more economical.
Selecting Quality Riblets
When choosing your riblets, look for these key quality indicators:
- Pinkish-red color with visible marbling
- Firm texture with no soft spots
- No dark spots on the fat (which should be white)
- No excess liquid in the package
Proper Storage and Handling
Proper storage is crucial for both safety and flavor. Fresh riblets can be refrigerated in their original packaging for 3-5 days at 40°F (4.4°C). For longer storage, freeze them at 0°F (-17.8°C) or below, where they’ll maintain quality for up to 3-4 months.
When handling riblets, always follow these essential safety practices:
- Keep them refrigerated until you’re ready to cook
- Use separate cutting boards for raw meat
- Wash hands thoroughly with soap and hot water before and after handling
- Never leave riblets at room temperature for more than two hours
For the best results with your smoked riblets recipe, take them straight home after purchase and refrigerate immediately. If you’re planning to freeze them, wrap them tightly in freezer paper or heavy-duty aluminum foil, pressing out as much air as possible. This careful attention to storage and handling will ensure your riblets are perfect when it’s time to smoke them.
Essential Preparation Steps
Proper preparation is the foundation of any great smoked riblets recipe. Let’s start with the essential steps that will set you up for smoking success.
Trimming and Membrane Removal
The key to tender riblets starts with proper trimming. Here’s how to prepare your riblets:
- Place riblets bone-side up on a clean cutting board
- Locate the thin, white membrane on the bone side
- Slide a butter knife under the membrane at one corner
- Grip the membrane with a paper towel and pull firmly
- Remove any excess fat pockets or hard fat areas
Basic Brine Solution Recipe
A proper brine ensures your riblets stay moist throughout the smoking process. Mix together:
- 1 gallon water
- 1/2 cup kosher salt
- 1 cup brown sugar
- 1/2 cup soy sauce
Submerge your riblets in this solution for at least 2 hours or overnight for best results. Keep the container refrigerated throughout the brining process.
Dry Rub Combinations
A well-balanced dry rub enhances the natural pork flavor. Here’s a proven combination that delivers consistently excellent results:
- 1/4 cup brown sugar
- 2 teaspoons kosher salt
- 2 teaspoons black pepper
- 2 teaspoons smoked paprika
- 1 teaspoon garlic powder
- 1 teaspoon onion powder
- 1 teaspoon ground mustard
- 1/2 teaspoon cinnamon
- 1/2 teaspoon celery salt
Pro Tip: Apply a thin layer of olive oil before adding your rub to help it adhere better. When applying the rub, use a shaker from about 12 inches above the meat for even distribution. This technique ensures uniform coverage and consistent flavor in every bite.
For optimal results, let the seasoned riblets rest in the refrigerator for at least 30 minutes before smoking. This resting period allows the rub to form a slight moisture barrier, which helps create that coveted bark during smoking.
Remember to store any leftover dry rub in an airtight container. When properly stored, your rub mixture will maintain its flavor for up to a month, though you may need to break up any brown sugar clumps before using.
Smoking Setup and Equipment
Success in smoking riblets starts with selecting the right equipment and mastering proper temperature control. Let’s explore the essential elements that will help you achieve perfectly smoked riblets every time.
Choosing the Right Smoker Type
Your choice of smoker significantly impacts your results. Here’s a comparison of popular options:
| Smoker Type | Temperature Control | Ease of Use | Flavor Profile |
|---|---|---|---|
| Pellet | Excellent | Very Easy | Good |
| Electric | Very Good | Easiest | Mild |
| Charcoal | Moderate | Challenging | Excellent |
| Gas | Good | Easy | Good |
For beginners, pellet smokers offer an ideal balance of convenience and flavor, maintaining steady temperatures between 225-250°F. Charcoal smokers, while requiring more attention, deliver superior smoke flavor and are often more budget-friendly.
Best Woods for Smoking Riblets
The right wood choice enhances your riblets’ flavor profile. Here are top-performing combinations:
- Cherry + Pecan: Creates a subtle, sweet profile
- Hickory: Delivers classic, strong smoky flavor
- Apple: Offers mild, fruity notes
- Oak: Provides medium smoke intensity
Pro Tip: Avoid softwoods and green wood, as they can impart bitter flavors and produce harmful toxins.
Temperature Control Tips
Maintaining consistent temperature is crucial for perfectly smoked riblets. Follow these proven strategies:
- Use accurate thermometers: Don’t rely solely on built-in smoker gages, as they’re often inaccurate. Place a separate thermometer near the meat for precise readings.
- Manage airflow effectively: Proper ventilation prevents stale smoke and maintains steady temperatures. Use your smoker’s dampers to control airflow and adjust heat levels.
- Monitor fuel levels: For charcoal and wood smokers, add fuel gradually to maintain consistent heat. With pellet smokers, ensure the hopper stays well-stocked throughout the cooking process.
- Weather considerations: In colder weather, preheat your smoker for at least an hour before cooking. This helps maintain stable cooking temperatures throughout the smoking process.
Remember, successful temperature control means keeping your smoker between 225-250°F. This range ensures proper collagen breakdown while preventing your riblets from drying out.
The 3-2-1 Smoking Method
The 3-2-1 smoking method has become a cornerstone technique for achieving perfectly tender riblets. This time-tested approach breaks down the smoking process into three distinct phases, each serving a specific purpose in developing flavor and texture.
Initial Smoking Phase
The first three hours are crucial for developing that signature smoke ring and bark. Start by placing your seasoned riblets directly on the smoker grates at 225°F. During this phase, the meat absorbs maximum smoke flavor while the exterior begins to develop a beautiful crust. Keep the smoker’s temperature steady between 225-275°F and resist the urge to open the lid frequently.
Wrapping and Braising
After the initial smoke phase, it’s time for the transformative wrapping stage. This two-hour process is where magic happens:
- Remove riblets from the smoker
- Double-wrap tightly in heavy-duty aluminum foil
- Add moisture enhancers before sealing:
- Apple juice for tenderness
- Brown sugar for sweetness
- Butter for richness
Temperature Guide During Phases
| Phase | Temperature | Duration |
|---|---|---|
| Initial Smoking | 225-275°F | 3 hours |
| Wrapped | 225-250°F | 2 hours |
| Final Glaze | 225-265°F | 1 hour |
Final Glazing Stage
The last hour focuses on developing that perfect sticky exterior. Remove the foil carefully (watch for hot steam) and return the riblets to the smoker. This is when you’ll apply your chosen sauce or glaze:
- Apply the first coating after unwrapping
- Brush on additional layers every 15-20 minutes
- Keep temperature below 265°F to prevent burning
Pro Tip: For extra-tender results, test doneness by inserting a toothpick between the bones – it should slide through with minimal resistance. The internal temperature should reach 205°F for optimal tenderness.
The beauty of this method lies in its consistency. The first phase develops smoke flavor, the wrapped phase tenderizes the meat through gentle braising, and the final hour creates that perfect glazed finish that makes your smoked riblets irresistible.
Testing for Doneness
Knowing exactly when your riblets are done can make the difference between tough, chewy meat and perfectly tender bites. Let’s explore the foolproof methods to test for doneness in your smoked riblets recipe.
Temperature Guidelines
While the USDA suggests 145°F for food safety, this temperature won’t give you the tender, succulent riblets you’re after. For optimal results, you’ll want to cook your riblets to a higher internal temperature:
| Stage | Temperature | Result |
|---|---|---|
| Minimum Safe | 145°F | Safe but tough |
| Collagen Breakdown | 195°F | Beginning to tenderize |
| Perfect Doneness | 198-202°F | Ideal tenderness |
When checking temperature, insert your probe into the thickest part of the meat between the bones. Take readings from multiple spots, as temperatures can vary across the rack.
Pro Tip: Use an instant-read thermometer to avoid heat loss in your smoker, which can extend cooking time.
Bend Test Technique
The bend test is a reliable method professional pitmasters use to check doneness. Here’s how to perform it:
- Pick up the rack using tongs at the center point
- Lift gently, allowing the ends to bend naturally
- Watch for the meat to crack on the surface
- Look for slight separation between the bones
- Check if the meat shows resistance to bending
If the rack is too stiff, it needs more time. If it falls apart completely, you’ve gone too far. The perfect bend should show slight cracking on the surface while maintaining structural integrity.
Resting and Serving
After achieving the perfect temperature and bend, proper resting is crucial for the best results. Here’s why:
- Moisture redistribution occurs during rest
- Muscle fibers relax and reabsorb juices
- Easier slicing with less meat falling off the bone
Let your riblets rest for 10-15 minutes minimum before serving. For the best resting technique:
- Place riblets on a warm plate
- Tent loosely with foil (avoid tight wrapping)
- Allow proper ventilation to maintain bark texture
Important Note: While you can rest riblets for up to four hours in an insulated container, extending beyond this time risks making the meat mushy.
For serving, cut the riblets into 2-3 inch portions. If you’ve applied sauce, the resting period allows it to “tack up,” creating that perfect sticky exterior your guests will love.
Remember that visual indicators like bone pull-back (where meat shrinks from the bone ends) can be helpful but shouldn’t be your only doneness test. The most reliable approach combines temperature readings with the bend test for consistently perfect results.
Conclusion
Smoking perfect riblets demands attention to detail, from selecting quality cuts to mastering the final doneness tests. Armed with proper preparation techniques, temperature control knowledge, and the reliable 3-2-1 method, you can create restaurant-quality riblets right in your backyard.
Success lies in patience and precision – carefully monitoring temperatures, performing accurate doneness tests, and allowing adequate resting time. These steps transform tough meat into tender, flavorful bites your guests will remember.
Remember that each smoking session offers learning opportunities. Start with these proven techniques, adapt them to your equipment, and soon you’ll develop your signature riblet style that rivals any professional pitmaster’s creation.
You might also like: A Brunch Twist on Panzanella for the Onset of Autumn


One Comment